|
Please open the "Exchange admin Center" and navigate to "mail flow – send connectors.
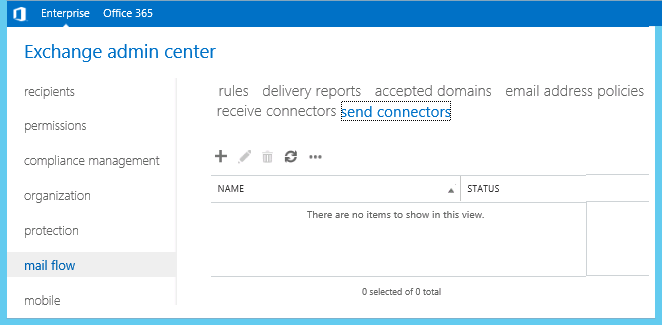
In order to set up a "new send connector", please click on the plus-sign.
|
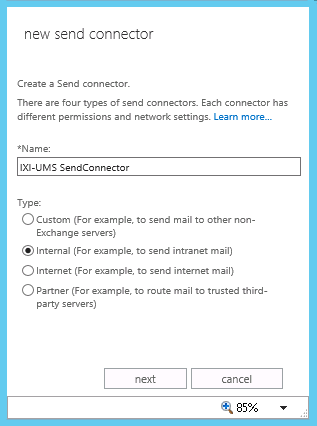
Please enter a name and select "Internal".
Enter "next" to continue.
|
|
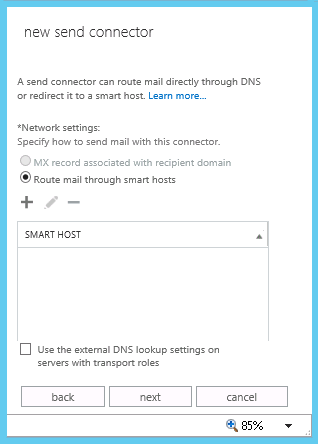
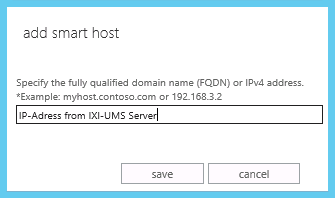
Select "Route mail through smart hosts" in the next window and add the IP-address of the IXI-UMS Exchange Connector.
|
|
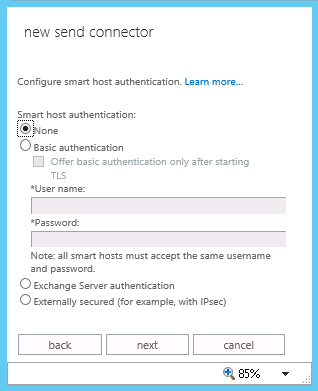
An authentication for the sending of e-mails (ixi-UMS messages) to the ixi-UMS Business Server is not required.
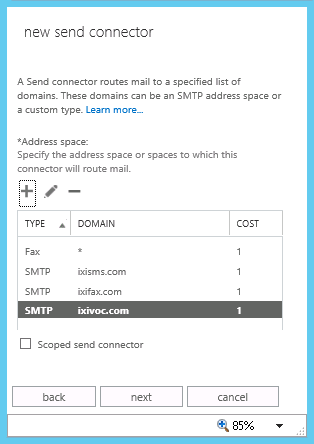
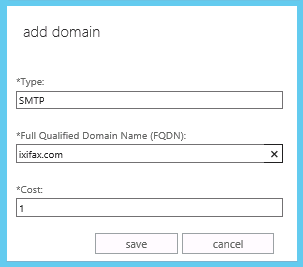
In the next window, you have to enter the required custom domains.
|
|
You have to enter all the wanted domains for the addressing. However, they can be added subsequently as well. This can also be changed later on.
The domain with Type "Fax" has to be entered only then that messages can be sent as fax out of the Outlook-Contacts via the "To"-field.
|
To finish the wizard select the correct exchange server in the next window and save the settings.
|